First Slash Command
This tutorial will walk you through creating your first slash command and then editing its source code.
- Step 1: Use /create-cmd
- Step 2: Use the new command
- Step 3: Edit the command using /set-source
- Step 4: Switch to private response
- Step 5: Optional delete with /delete-cmd
Step 1: Use /create-cmd
From inside of your Discord server, start by typing /create-cmd. You should see a Discord slash command hint pop up. Click on the one for Peaches.

Once you click on it, Discord will prompt you for its 2 required arguments. We will specify “hello” for the name and “Displays a greeting” for the description.

Now you can hit enter and it will open the source code editor. It will look something like this:

We will cover the first text box in a later tutorial. In short: it enables you to customize the command’s arguments and default permissions. It is optional, so you can leave it blank.
The second text box is auto-filled with default initial code. respond is a builtin function that tells the bot to reply to an interaction. If you leave out the response and then run the command, you’ll see an error in the Discord client saying that the bot did not respond even though it was expected to. The function and its argument are enclosed in {{}} tags which tells the bot to execute that line of code.
You can leave the default as it is and click Submit.
Step 2: Use the new command
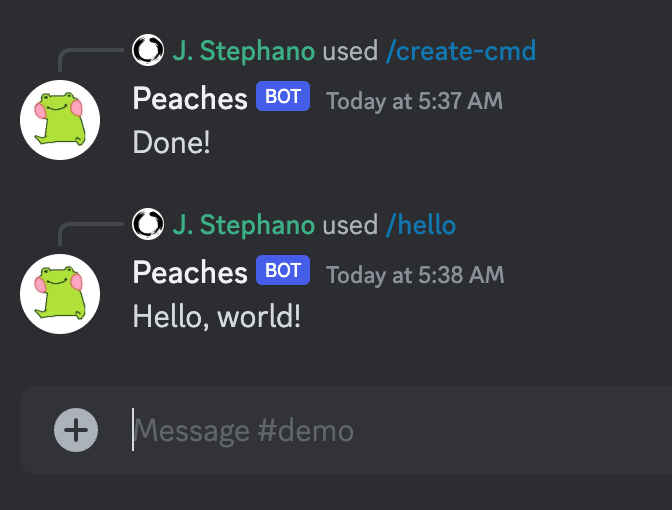
Once you hit submit on the last step, Peaches should create a new guild-local slash command called hello. When you start typing it, Discord will give you a suggestion like the following.

If you select it and hit enter, you should see the bot respond with “Hello, world!” in the chat.

Step 3: Edit the command using /set-source
Now that we have a new slash command registered with Discord, we can freely edit the underlying source code. From Discord’s perspective nothing will have changed, but from the bot’s perspective it will now execute a different piece of source code whenever the slash command is used.
We are going to make use of the slash command’s Context and the print function for this piece of code. What print does is to take a series of inputs and convert them into a single string that can be displayed to the user. We will explore the Context more in future tutorials, but for right now all we need to know is that the bot auto-populates context.Member with an object representing the member who used the command. We can use that to personalize the greeting by pulling out their username and displaying it.

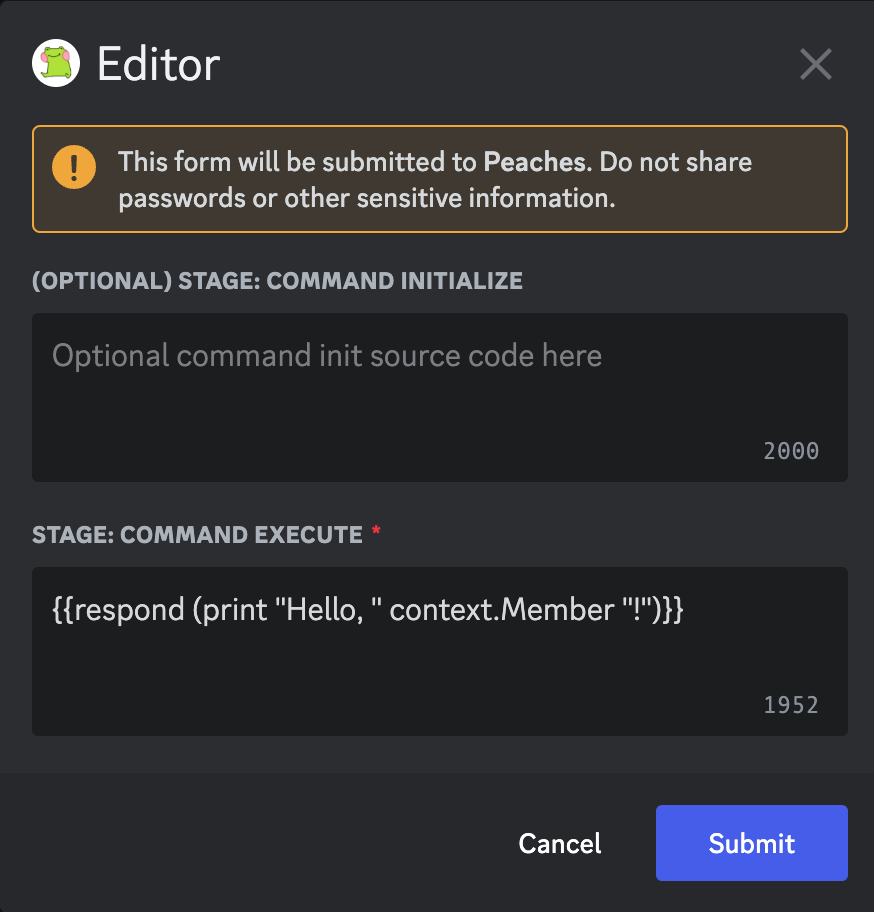
Once you hit enter, the Editor will again pop up. It will automatically populate the text box with the last saved source code for the command.

Notice that this time only one source code box appears. If we wanted the option to customize the slash command arguments, we would need to re-run /cmd-create.
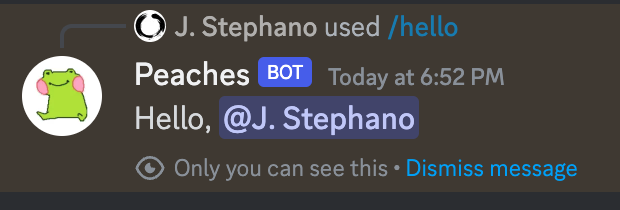
Once you hit submit the bot will give you a confirmation if everything went well and then you can try running the hello command again. Here’s the final result:

Step 4: Switch to private response
With the personalized greeting in place, we can do another source edit and change respond to respondPrivate. This tells the bot that it should reply with a private message in the channel to the user. These replies can’t be edited once sent, and only the receiver can dismiss them. This is the result:

Step 5: Optional delete with /delete-cmd
Now that this first tutorial is done, we can optionally clean up the command using /delete-cmd and passing in “hello” for the name.